Using the Service Center and Governance Center to Manage the Spring Cloud Application
Concept Description
This section describes how to change configurations in the native Spring Cloud application to allow the Spring Cloud application to use the service center and governance center in the microservice framework.
Scenario
-
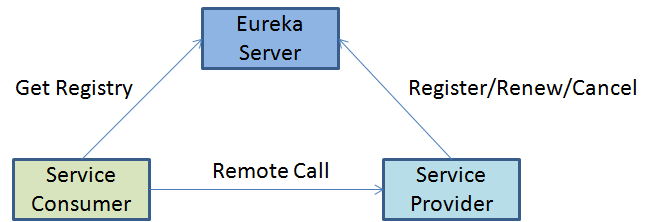
The Spring Cloud Eureka client provides the service discovery and service registration function in the distributed environment by default.

-
The service center in microservice framework is used to manage and process registration and discovery of service metadata and service instance metadata, and also supports the following functions:
The pull and push modes used to monitor instance changes
Dynamic instance scale-out, massive persistent connections, or short connections.
Advanced management features, such as gray release and sersvice grouping.
You can use Spring Cloud or Spring Boot to develop applications, enable services run in the microservice SDK container, and use functions, such as high-performance communication, service governance, and distributed transaction management.
Configuration Description
Use Spring Boot or Spring Cloud to develop applications and perform the following steps based on the original application to interconnect with the SDK components of ServiceComb.
NOTE, If your java chassis version is or below 0.5.0, please use the io.servicecomb as the groupId.
-
Step 1 Add dependencyManagement to teh POM file:
<dependencyManagement> <dependencies> <dependency> <groupId>org.apache.servicecomb</groupId> <artifactId>java-chassis-dependencies</artifactId> <version>1.0.0-m1</version> <type>pom</type> <scope>import</scope> </dependency> </dependencies> </dependencyManagement> -
Step 2 Add the following dependency to POM file.
<dependency> <!--let services run in the microservice SDK container.--> <group>org.apache.servicecomb</group> <artifactId>spring-boot-starter-provider</artifactId> </dependency> <dependency> <!--Use Service Center.--> <group>org.apache.servicecomb</group> <artifactId>spring-boot-starter-discovery</artifactId> </dependency> <dependency> <!--Let Servieces run in Spring boot embedded tomcat--> <group>org.apache.servicecomb</group> <artifactId>spring-boot-starter-transport</artifactId> </dependency> <dependency> <groupId>org.springframework.boot</groupId> <artifactId>spring-boot-starter-web</artifactId> </dependency><dependency> <groupId>org.springframework.boot</groupId> <artifactId>spring-boot-starter-actuator</artifactId> </dependency> -
Step 3 Configure the processing chain and protocol:
Create the microservice.yaml file in the resources directory and define the service. For details, see Service Definition. For example:
APPLICATION_ID: discoverytest service_description: name: discoveryServer version: 0.0.2 servicecomb: service: registry: address: http://127.0.0.1:30100 #Service Center registration rest: address: 0.0.0.0:8080 #Port number released by the service handler: chain: Provider: default: bizkeeper-provider #Call processing chain -
Step 4 To use the ServiceComb configuration center, run the following commands
Add the following dependency to POM file:
<dependency> <!--Use the configuration center--> <group>org.apache.servicecomb</group> <artifactId>spring-boot-starter-discovery</artifactId> </dependency> -
Step 5 Add the annotation @EnableServiceComb to the main class:
@EnableDiscoveryClient @SpringBootApplication @EnableServiceComb //new annotation public class xxxServer { public static void main(String[] args) { SpringApplication.run(xxxServer.class, args); } } -
Step 6 Define the API definition. For details ,see Service Contract:
// ControllerImpl.class: @RestSchema(schemaId = "test") @RequestMapping(path = "/compute", produces = MediaType.TEXT_PLAIN) public class ControllerImpl { @ResponseBody @RequestMapping(path = "/hello/{name}", method = RequestMethod.GET) public String add(@PathVariable String name) { return "hello" + name; } } -
Step 7 Start the xxxServer. The service can be registered in the service center of ServiceComb.